


08 Apr Makeover Monday – Felt Flower Tutorial


I loved the look of these felt flower pillows and wall decor that can be found on Etsy and Anthropology!
They looked super simple so I decided to try and make one to see what I could come up with.
It’s super simple and easy to do so if you like the look of these pillows, give it a try.
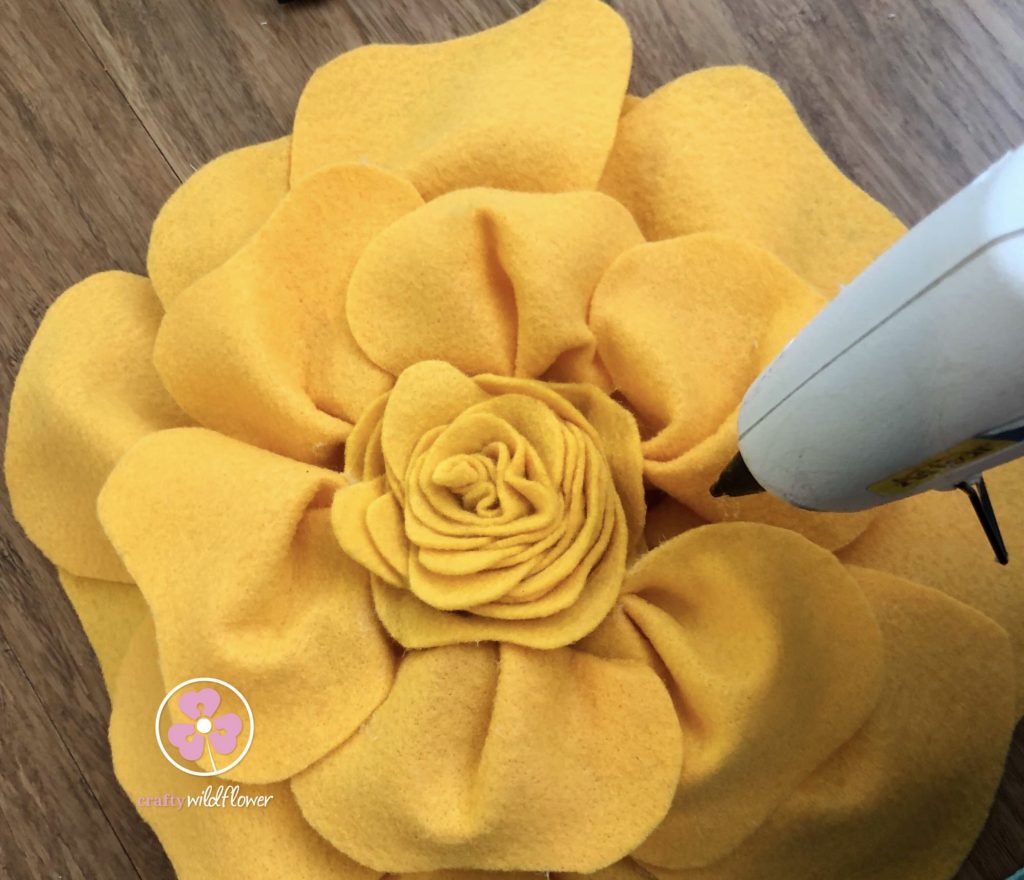
First I made the middle part of the flower by cutting a piece of felt into a wavy circle pattern and rolling that up to make a flower shape. When you have it the way you like, glue a piece of felt to the bottom to secure it all together.
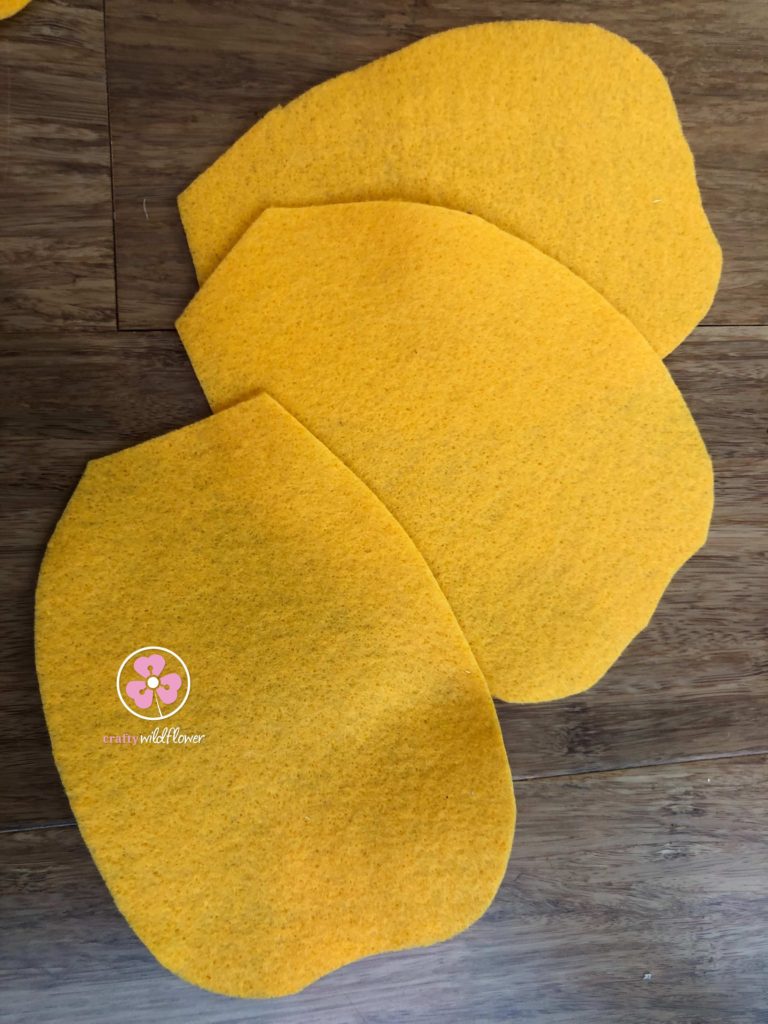
Next cut out several different sizes of petals. The number will vary depending on how big you want your flower to be. Play around with this and keep adding petals until it looks the way you like it. I started with about 5 small, 8 medium and 10 large.
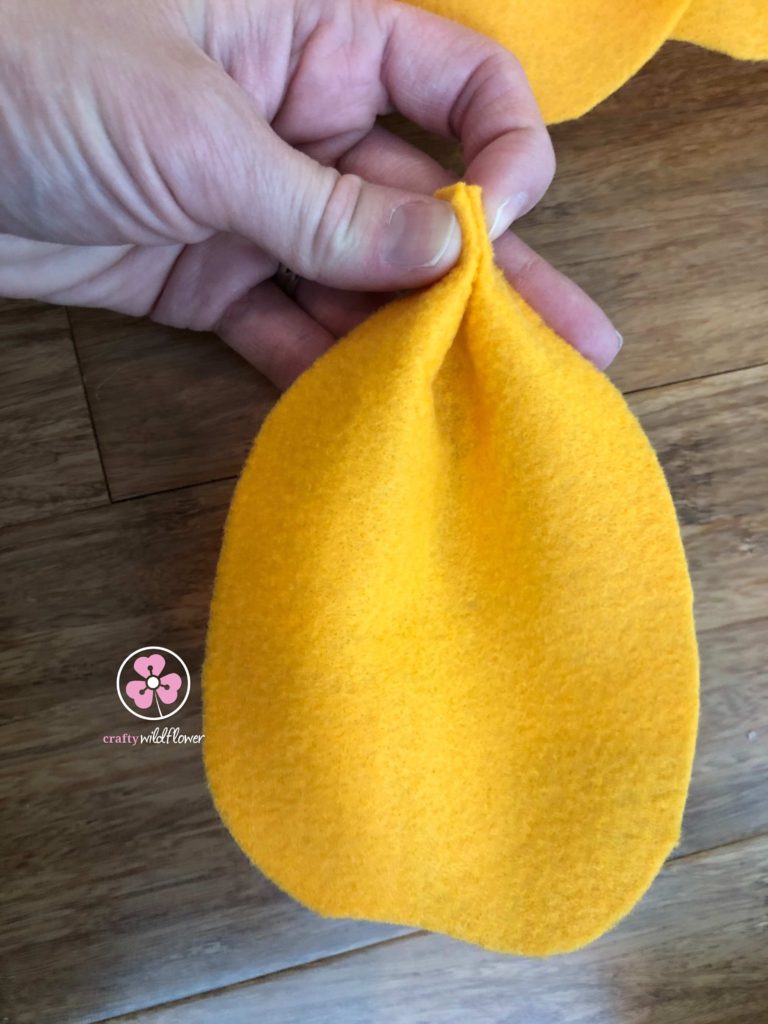
After all of the petals were cut out, I took each petal and at the bottom edge and pinched it in half and glued it together.
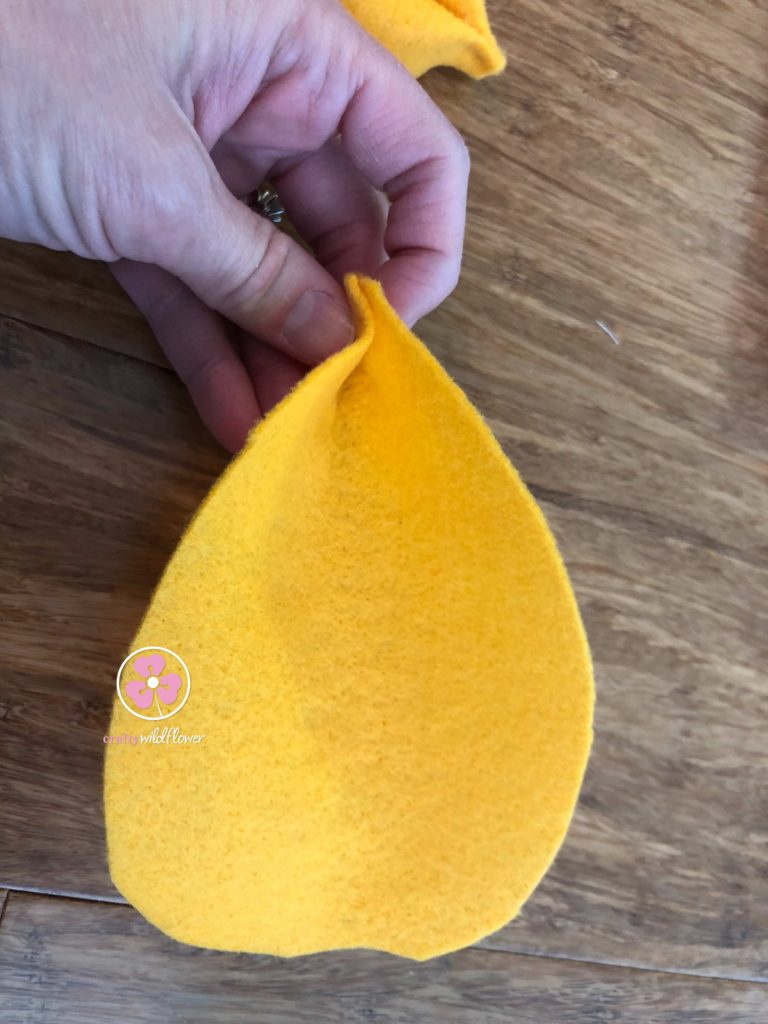
Then I folded down the sides and glued those down. This gives the felt dimension.
I’ve included a video so you can see the process.
After I had all of my petals made, I started arranging them how I wanted them on the pillow and started sewing them with a few simple stitches. I wanted them to have dimension so I just put a few stitches at the bottom of each petal.

You can also use hot glue if you would like.
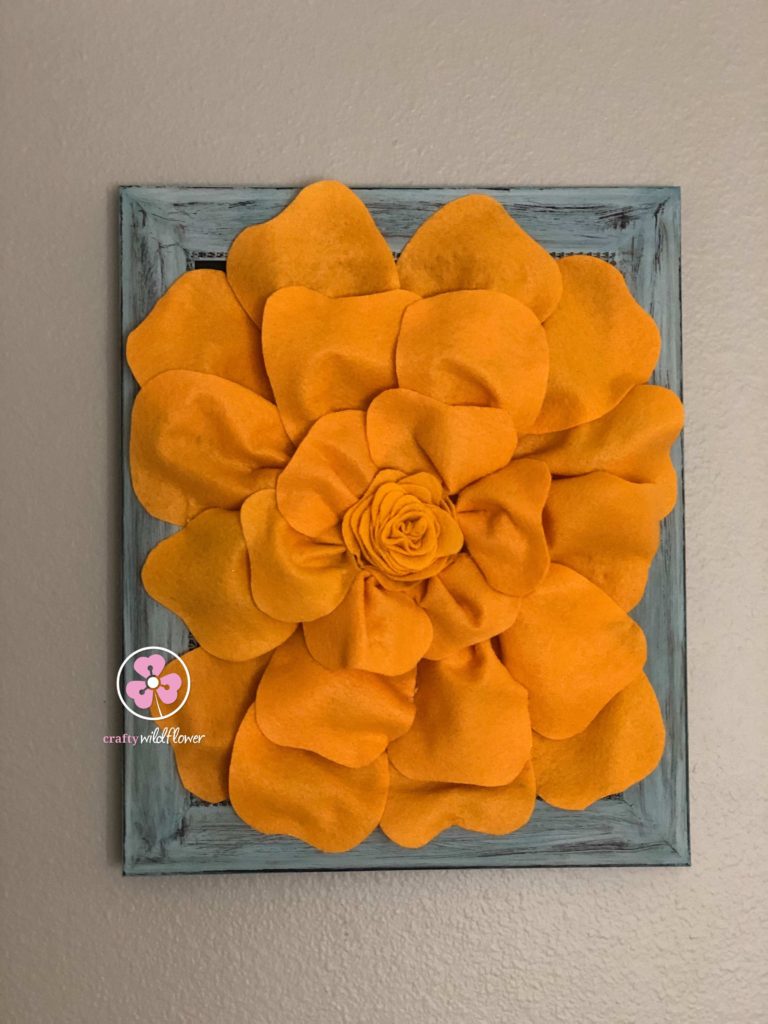
Which is what I did when I put another flower together into a piece of wall art in a simple frame I painted.
Follow the same process as above, arranging the petals in the frame until you have it just the way you like it.
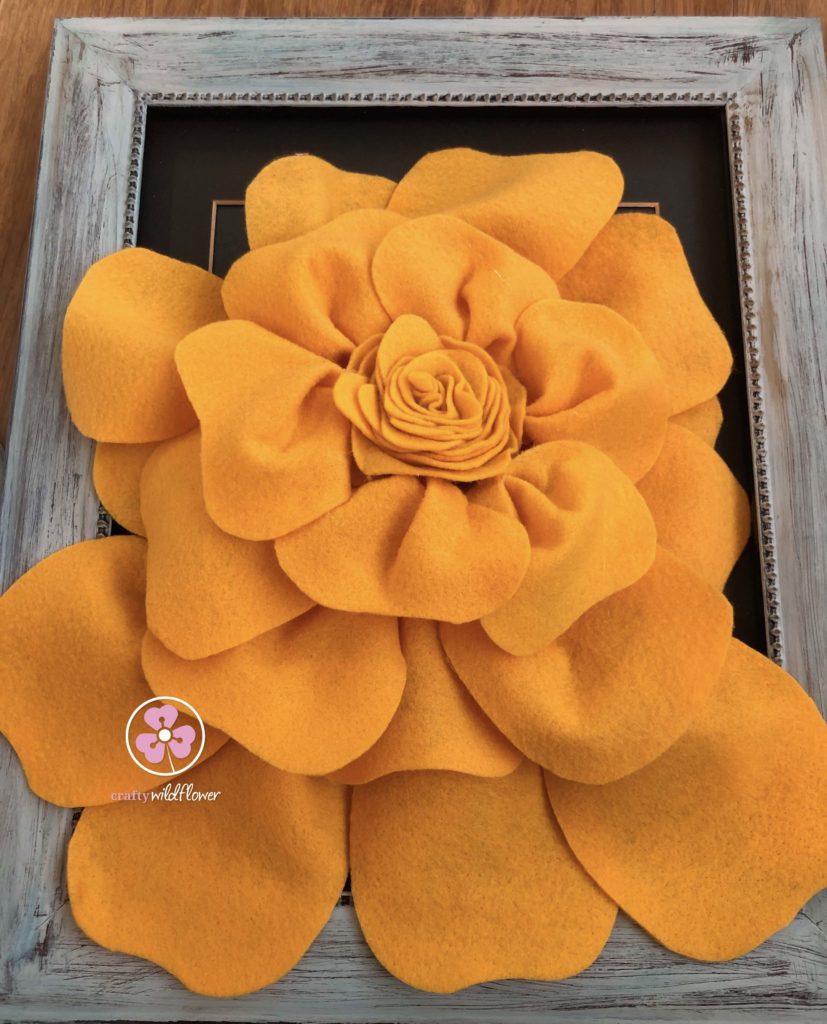
Then glue it all down to the frame.
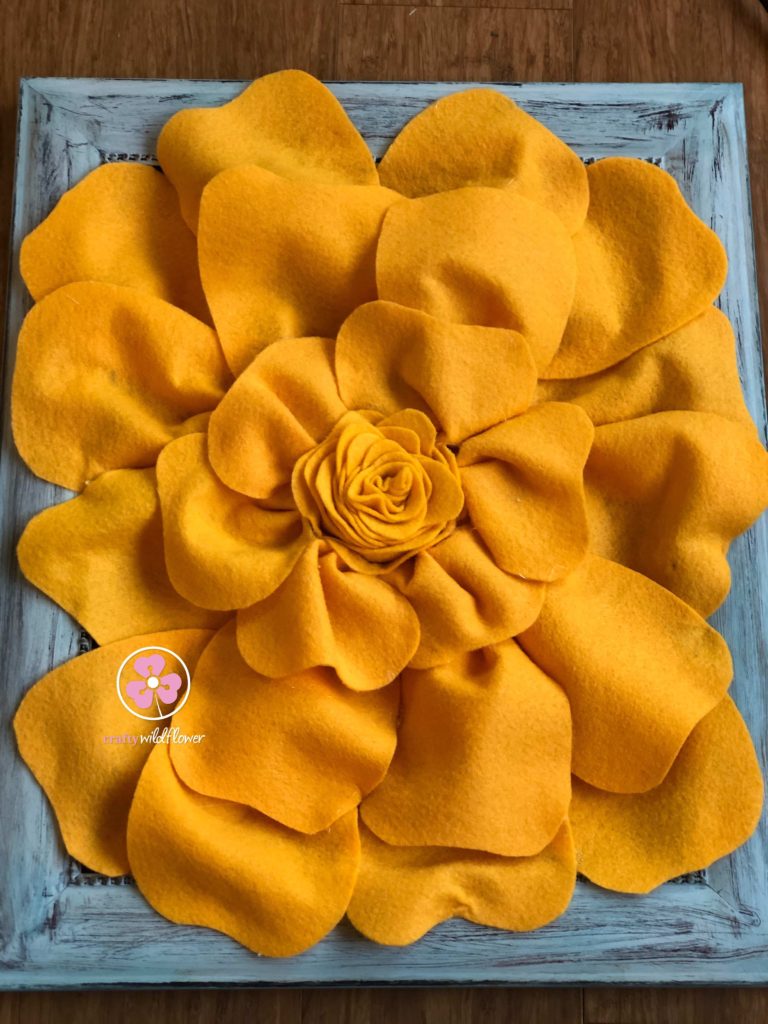
I ended up overlapping my petals onto the frame but wish I hadn’t. I liked it better when it looked like it was set in the frame with a 3 dimensional look.

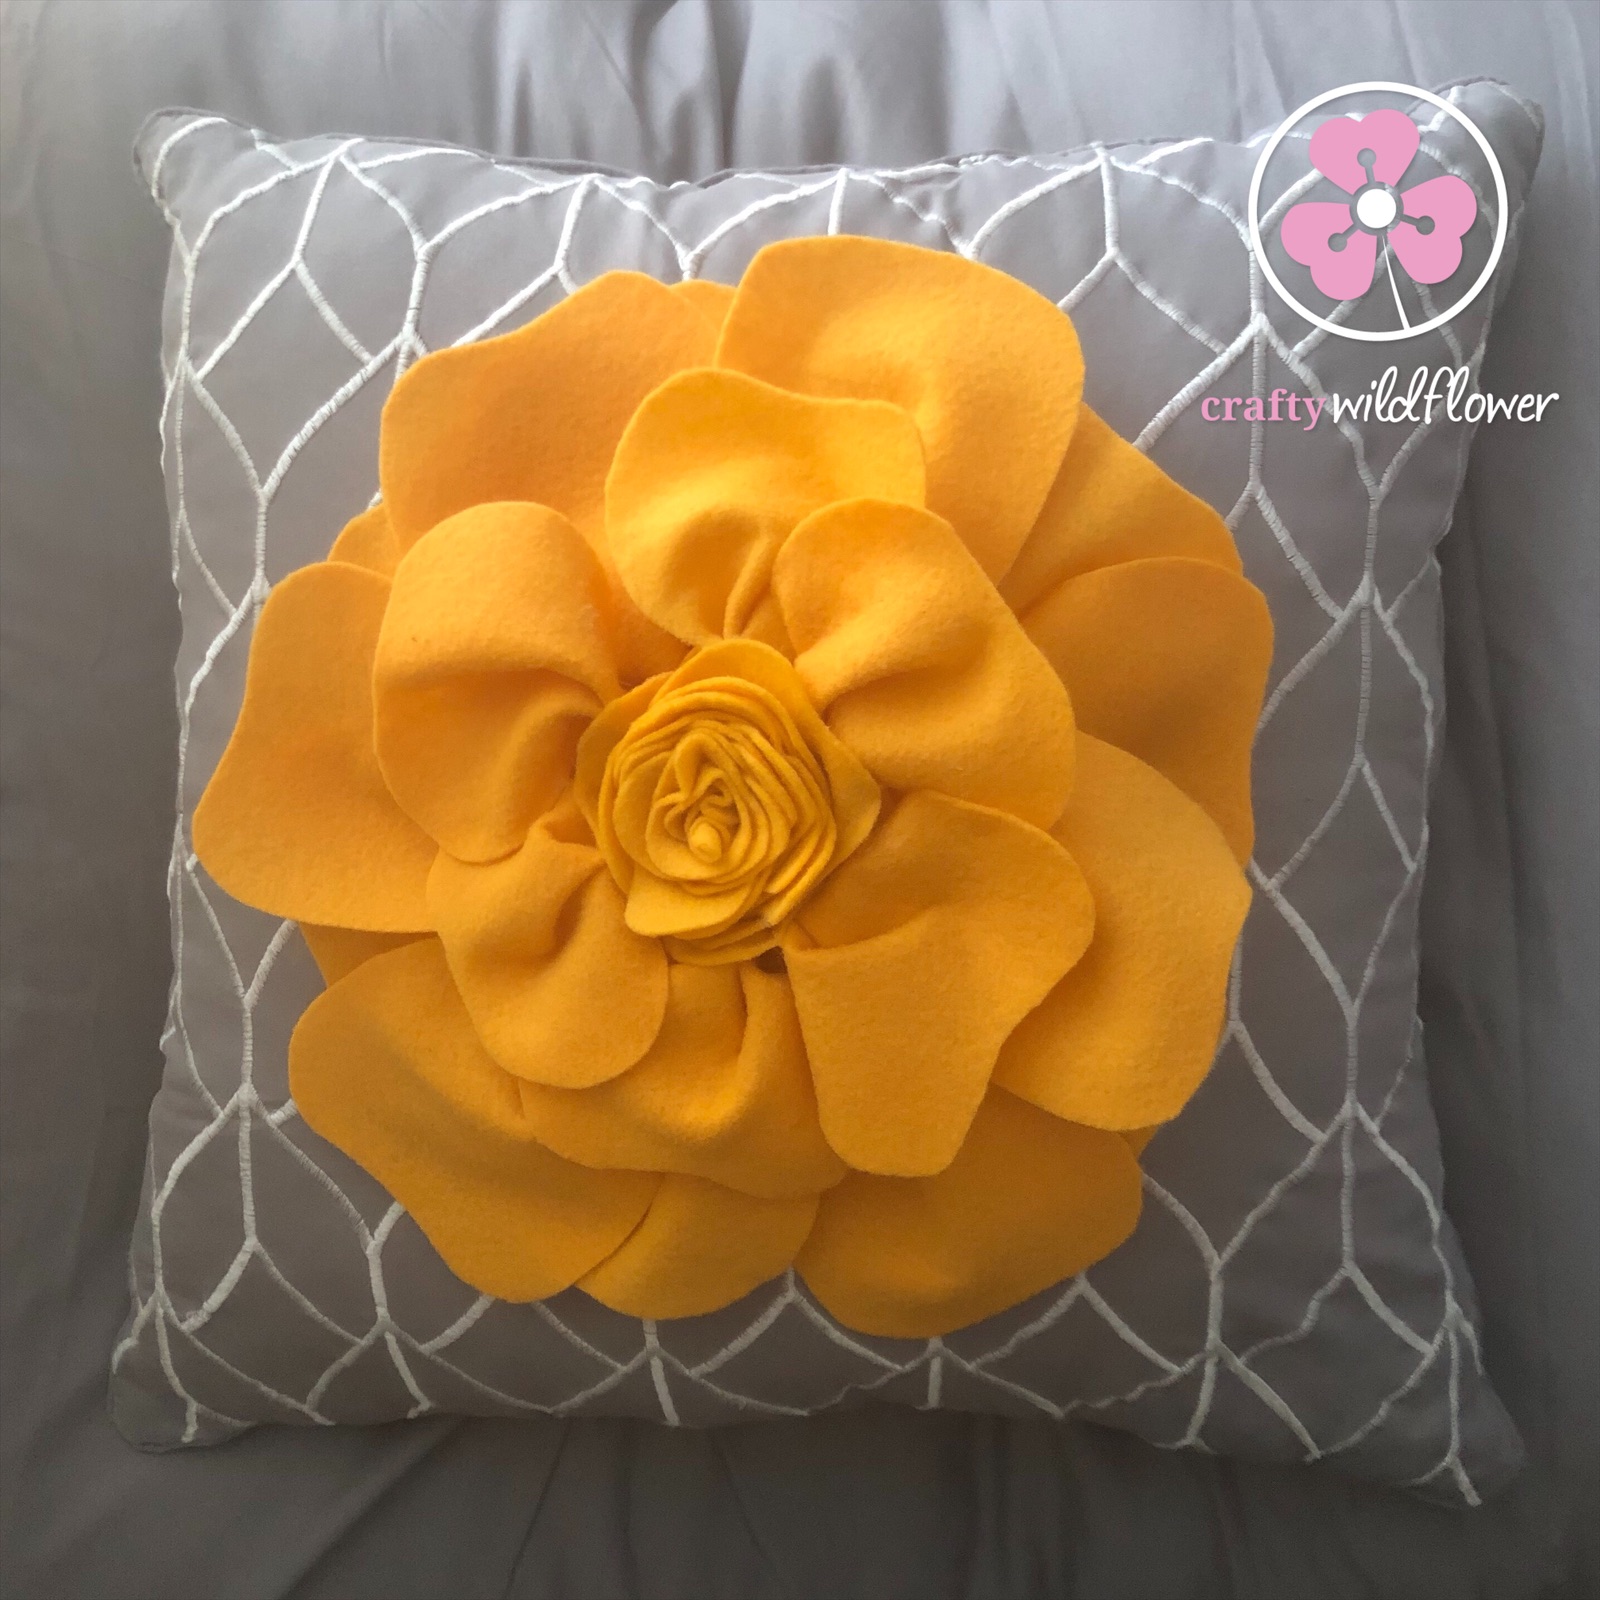
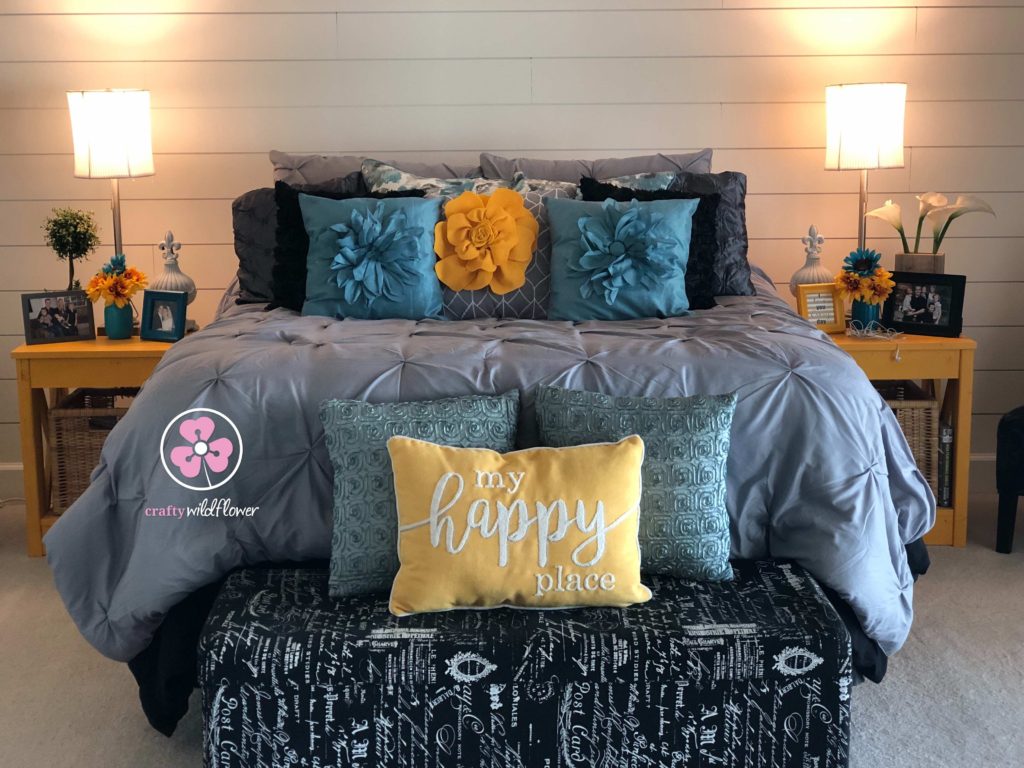
And there you have it, a super cute, super easy way to brighten up some throw pillows like I did in my bedroom remodel.
Or give a wall space a new look!
Have a Happy Day!!
Sorry, the comment form is closed at this time.