


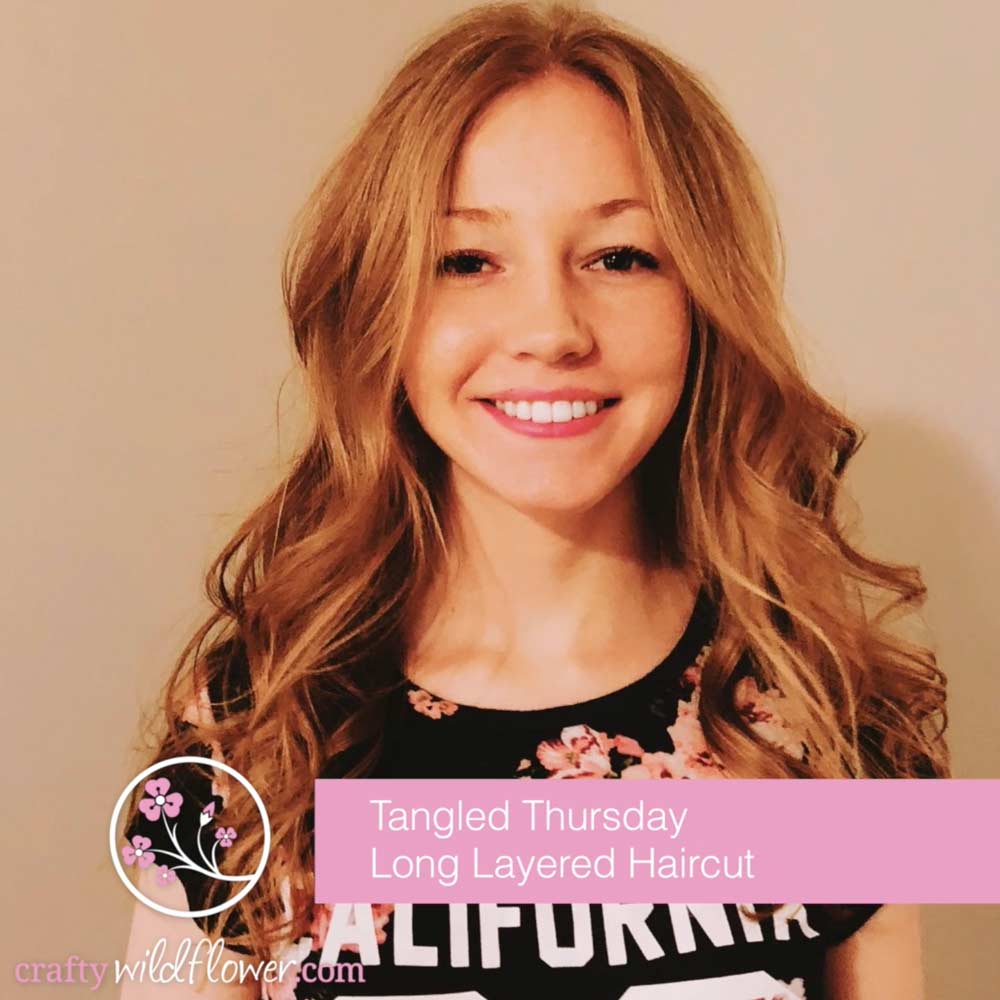
21 Mar Long Layered Haircut – Tangled Thursday


Easy Long Layered Haircut
Watch the short video to see how simple this long layered haircut is to do. You can even do it yourself!
The haircut I am doing on my daughter, Makayla, is the same haircut I do on myself about every 6-8 weeks.
I’m teaching my daughter how to cut her own hair so she can do it herself when she heads to college this fall.
If you’re interested in trying this on yourself, follow these simple steps.
Long Layered Haircut Tutorial
- First part hair down the middle and separate into two halves.
- Evenly trim the bottom while the hair is brushed around front. Check to make sure that the sides line up together and look even.
- pull all of the hair up on top of the head and put in a hair tie.
- Make sure the hair is evenly brushed and smooth with the hair going up to the hair tie instead of around the sides.
- I have found it best if you do not have bangs to leave a 1/2 inch section out of the hair tie and do not cut it until later. I’ve found if you cut this with the other hair it ends up too chunky around the face when you do not have bangs.
- You can leave the hair taught, but I slightly pulled the hair to loosen it at the crown.
I like this better for my daughters particular hair because my daughters hair is very fine and I find that cutting it this way looks best on her type of hair. I have found that the hair tends to blend better and work well for her hair type.
- Next I wrap a second hair tie around the ponytail and pull it down until I reach the amount of hair I want to cut off. On Makayla’s we cut off a couple inches.
- Be cautious with this part. You can always cut off more hair so start with a conservative amount. I’ve done this haircut on her many times so I knew this amount would look good on her hair.
- Last I part the hair down the center again and gently and conservatively blend the front. Only cut the hair that is from the ear forward or less.
That’s it! Super simple and easy to do on yourself or someone else.
Normally, I wouldn’t encourage anyone to cut their own hair but this is so easy, anyone can do it!
As long as you go slowly and stay on the conservative side,you will be fine.
You can ALWAYS cut off more!
- When you style this haircut you can do a quick blow dry or if you want more volume at the roots, round brush it and flip the hair over the front until cool
- For fine hair give a quick shot of hairspray before curling to help the curls stay
- Use a 1” curling iron for the beach wave look.
- Pull fingers through hair to loosen the curls
- Back comb the top for volume
- Use hairspray to finish off. Less if you want it workable and more if you need it to stay put for hours.
Also, my FAVORITE way to hold all of our MANY hairstyling needs and tools for all of the girls in my house, is with this cute, portable, mint green cart. You can find it here
I love hanging this over the side of the cart to store our irons and blow dryer.
That way whoever needs to use the cart has everything easily at their disposal, and it’s portable so it can be rolled to any room or bathroom.
Have fun with your cute, new haircut!
Have a happy day!!
Sorry, the comment form is closed at this time.